For a hearty and flavorful dish, I recommend using a sturdy cut of beef, such as chuck or brisket, which benefits from slow cooking. Begin by seasoning the meat generously with salt and pepper. This step enhances the flavor profile and prepares the beef for searing.
Next, heat a heavy-bottomed pot or Dutch oven over medium-high heat. Add a splash of oil and sear the beef on all sides until a golden-brown crust forms. This caramelization adds depth to the final dish. Once browned, remove the meat and set it aside.
In the same pot, sauté aromatic vegetables like onions, carrots, and celery until they soften. Adding minced garlic gives an additional layer of flavor. Deglaze the pot with a quality bottle of the tart grape beverage, scraping up any brown bits. This liquid will form the base of your sauce, combining with herbs such as thyme or bay leaves to create a rich, inviting aroma.
Return the seared beef to the pot, ensuring it’s submerged in the liquid. Cover and reduce the heat to low, allowing it to simmer gently for several hours. This method transforms the meat into a tender delight, infused with the savory notes of the sauce. Serve it alongside creamy mashed potatoes or crusty bread to soak up the delicious juices.
Cooking Method for Braised Meat in a Rich Sauce
Begin with a heavy-bottomed pot or Dutch oven. Heat a tablespoon of olive oil over medium-high heat. Sear the meat on all sides until a deep brown crust forms, which enhances flavor. Remove the meat and set aside.
Add chopped onions, carrots, and celery to the pot. Sauté until softened, about 5-7 minutes. Incorporate minced garlic and cook for an additional minute until fragrant. Pour in two cups of full-bodied beverage, scraping the bottom to release any flavorful bits.
Building Flavor
Return the meat to the pot. Add thyme, bay leaves, and a few whole peppercorns. For depth, consider adding a tablespoon of tomato paste. Bring the mixture to a gentle simmer, then reduce heat to low. Cover and let it gently bubble for 2 to 3 hours, or until the meat is fork-tender.
Optional: In the last half hour, you can add mushrooms or pearl onions for added texture and taste. Adjust seasoning with salt and pepper as needed.
Finishing Touches
Once cooked, remove the meat and let it rest for a few minutes. Skim excess fat from the surface of the sauce. If desired, thicken the sauce by simmering uncovered until it reaches the desired consistency. Slice the meat and serve with the sauce drizzled over the top.
This preparation creates a hearty dish perfect for a cozy meal. Enjoy the rich flavors that develop through the slow cooking process.
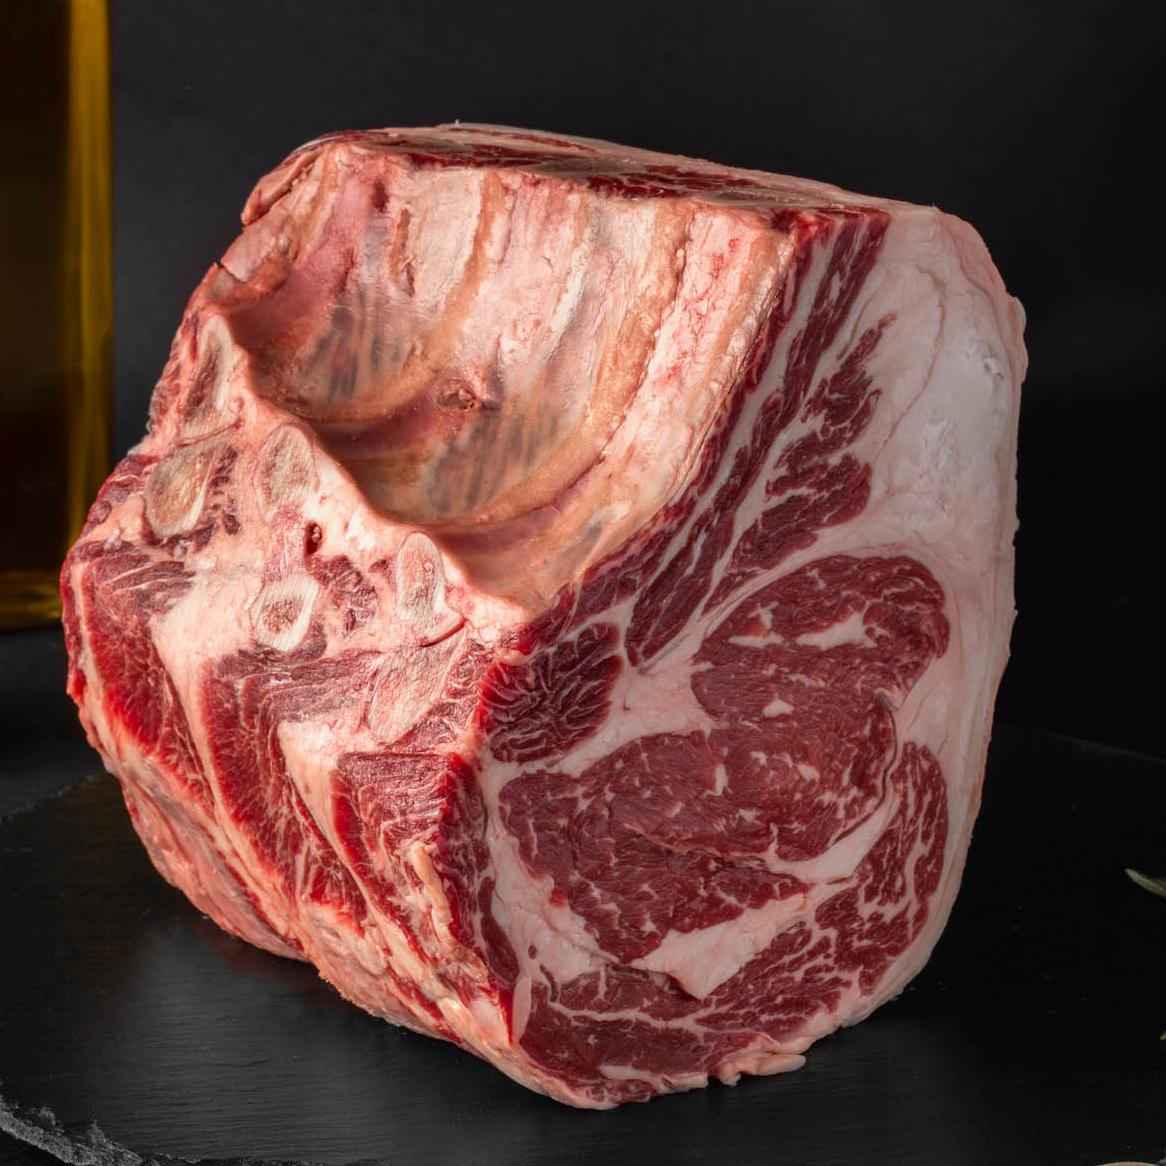
Selecting the Right Cut of Beef for Braising
I always choose cuts with good marbling and connective tissue for slow cooking in liquid. Chuck, brisket, and round are my go-to options. Chuck offers a rich flavor and tenderness after hours of simmering, while brisket delivers a slightly fattier profile that enhances the sauce. Round is leaner but can still yield satisfying results when cooked properly.
Chuck Roast
This cut is my favorite due to its well-distributed fat and tough fibers, which break down beautifully during the cooking process. I find that a chuck roast becomes incredibly tender, making it ideal for hearty dishes.
Brisket
Brisket is perfect for those who enjoy a richer flavor. The fat cap contributes to a moist texture, and the meat absorbs flavors exceptionally well. I often opt for a point cut, as it has more marbling than the flat cut, resulting in a juicier outcome.
Choosing the right piece is crucial for achieving depth in flavor and tenderness. Always look for a cut that appears well-marbled and has some connective tissue for the best results.
Preparing the Steak: Marinade and Seasoning Tips
I recommend marinating the meat for at least 4 hours, or preferably overnight, to enhance flavor and tenderness. A simple marinade can include a mix of olive oil, garlic, thyme, and bay leaves. Add a splash of balsamic vinegar or citrus juice for acidity, which helps to break down the meat fibers.
When it comes to seasoning, use a generous amount of salt and black pepper right before searing. This ensures a flavorful crust. Consider adding herbs like rosemary or oregano for an aromatic touch. A light dusting of flour can also help create a nice browning during the initial cooking phase.
For an extra layer of flavor, I often include chopped onions and carrots in the marinade. This not only enhances the taste but also contributes to a rich sauce later on. If you enjoy a bit of heat, a pinch of smoked paprika or crushed red pepper flakes can add a pleasant kick.
Remember to remove the meat from the marinade and let it come to room temperature before searing. This step aids in achieving a better crust and even cooking. After marinating, pat the meat dry with paper towels to ensure a good sear.
Choosing the Best Red Wine for Cooking
Opt for a bottle that you would enjoy drinking, as the flavors will intensify during the simmering process. Look for wines with good acidity and balanced tannins, which complement the richness of the protein. Varietals such as Merlot, Cabernet Sauvignon, or Pinot Noir work exceptionally well.
Consider the Flavor Profile
Select a wine that matches the flavor profile of the dish you’re preparing. For a robust and hearty meal, a full-bodied option like a Cabernet Sauvignon enhances the depth of the sauce. If your dish leans towards lighter flavors, a softer choice like Pinot Noir will add elegance without overpowering.
Quality over Price
Avoid the cheapest options; investing a little more can significantly impact the final taste. A mid-range bottle, generally priced between $10 and $20, will provide a better experience than a low-cost variety. Check for wines that are labeled “dry” for reduced sweetness, which can lead to a more balanced dish.
Keep an eye on the region as well; wines from regions renowned for their winemaking often carry distinct characteristics that can enhance your meal. Don’t hesitate to experiment with different bottles to find your favorite pairing.
Cooking Equipment Needed for Braised Dishes
A heavy-bottomed Dutch oven is my go-to choice for preparing these types of meals. It retains heat well and allows for even cooking. Look for one with a tight-fitting lid to trap moisture and flavors.
Additional Tools
Besides a Dutch oven, I keep a few other tools handy:
- A large wooden spoon for stirring.
- A pair of tongs to handle meat easily.
- A sharp chef’s knife for slicing vegetables and meat.
- A cutting board to protect your countertops.
Essential Accessories
Don’t overlook these accessories that enhance the cooking process:
| Accessory | Purpose |
|---|---|
| Meat thermometer | Ensures the meat reaches the desired tenderness. |
| Strainer | Helps separate solids from liquids if needed. |
| Serving platter | For presenting the finished dish attractively. |
With the right equipment, the process becomes smoother and more enjoyable, leading to a flavorful and satisfying meal.
Step-by-Step Guide to Browning the Meat
Begin with selecting a heavy-bottomed pan or Dutch oven. Preheat it over medium-high heat until it’s hot enough to sizzle. This ensures a proper sear.
Pat the meat dry using paper towels to eliminate moisture. This step is vital for achieving a golden crust.
Season the surface generously with salt and pepper. This enhances the flavor during the browning process.
Pour a tablespoon of oil, such as vegetable or canola, into the hot pan. Wait for the oil to shimmer before proceeding.
- Carefully add the meat to the pan, ensuring not to overcrowd it. Browning in batches allows for even cooking.
- Let it sear without moving for about 4-5 minutes. Flip only when a rich brown crust forms.
- Repeat on all sides until evenly browned. This locks in the juices and builds flavor.
Once browned, transfer the meat to a plate and set aside. Deglaze the pan with a splash of broth or vinegar, scraping up any flavorful bits stuck to the bottom. This creates a base for the sauce.
Now, the meat is ready for the next steps in preparing a delicious dish. Following these instructions ensures a well-seared component that enhances the overall result.
Creating the Braising Liquid: Ingredients and Ratios
For a robust flavor profile, I combine equal parts of stock and a quality beverage, typically a full-bodied variety. A common ratio is 1 cup of each, but I often adjust based on the size of the meat. Start with 2 cups if you’re preparing a larger cut.
Aromatics play a crucial role. I usually add 1 medium onion, diced, along with 2-3 cloves of minced garlic. For depth, a couple of carrots, chopped, and a stalk of celery enhance the mixture. Fresh herbs like thyme and bay leaves contribute a fragrant note; I use 1-2 sprigs of thyme and 1 bay leaf per batch.
To balance the flavors, I incorporate a tablespoon of tomato paste, which adds richness, alongside a splash of vinegar or lemon juice for acidity. A teaspoon of sugar can help to counterbalance the acidity if necessary. Adjust these elements according to taste; I often taste the liquid before adding it to the pot.
Finally, don’t forget about seasoning. Salt and pepper should be added liberally to enhance the overall taste. I prefer to season the liquid before it simmers, allowing the flavors to meld together beautifully during the cooking process.