Begin with high-quality meat, preferably chuck or brisket, cut into generous chunks. This will ensure a rich flavor and tender texture. Sear the pieces in a hot pan until browned on all sides to develop a deep, savory base.
Next, layer in hearty vegetables such as carrots, potatoes, and onions for a satisfying mix. Fresh herbs like thyme and rosemary will elevate the taste, so don’t skip these. Pour in your choice of a robust grape beverage, which will enhance the dish’s complexity.
Set the temperature low and let it simmer for several hours. The prolonged cooking time will meld the flavors beautifully and create a comforting meal. Serve it with crusty bread or over creamy mashed potatoes for a complete dining experience.
Selecting the Right Cut of Meat
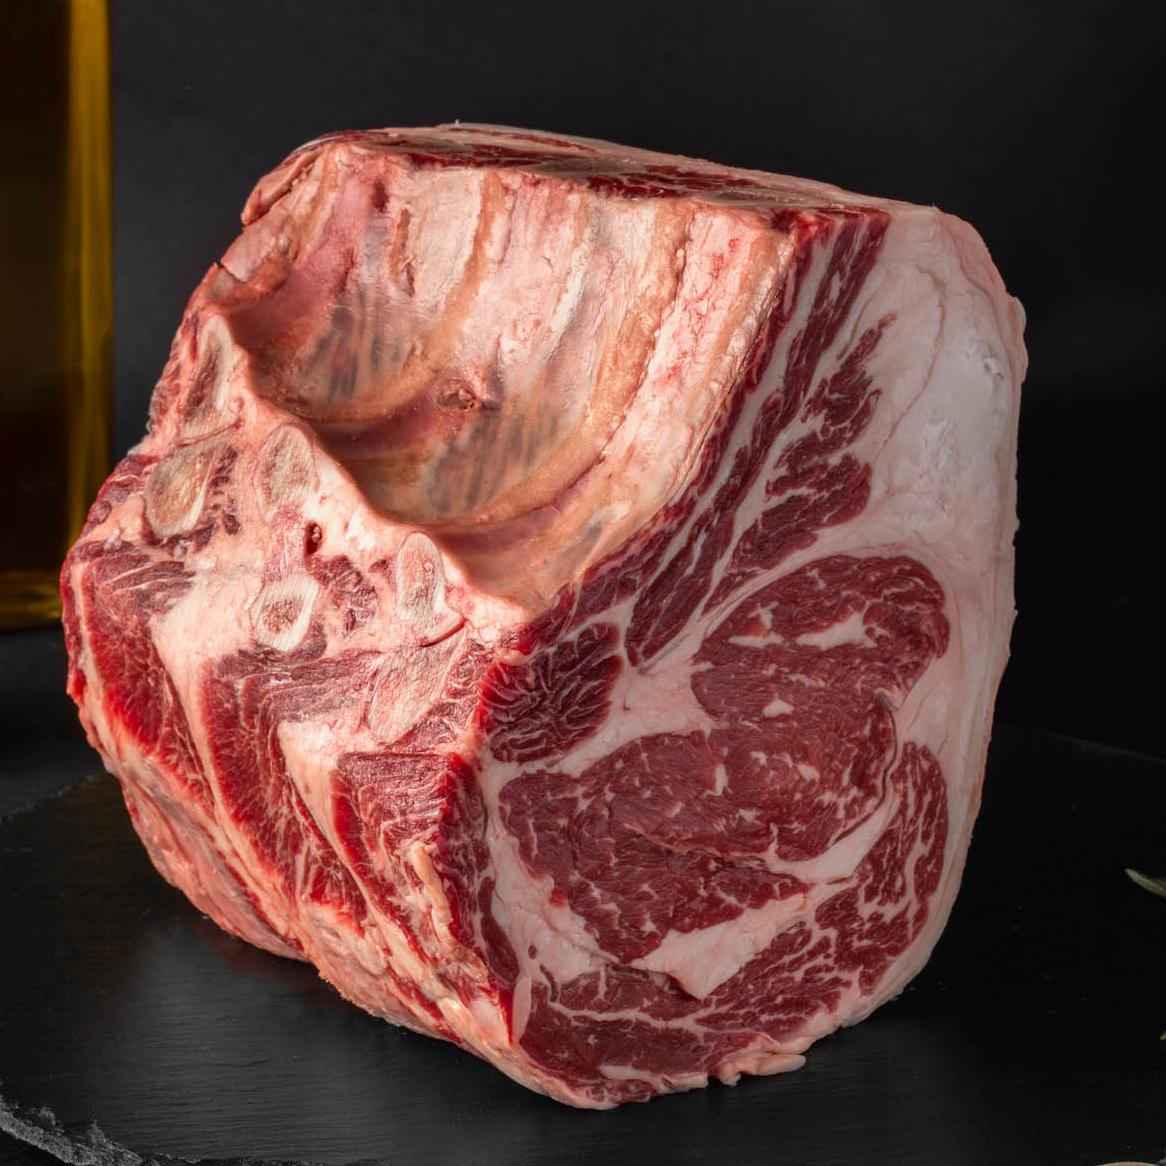
For optimal results in your dish, I recommend choosing cuts that are rich in flavor and have sufficient marbling. Chuck roast is an excellent option, as it becomes tender and juicy after prolonged cooking. Brisket is another fantastic choice, known for its robust taste and ability to absorb surrounding flavors.
Recommended Cuts
| Cut | Description |
|---|---|
| Chuck Roast | Well-marbled, ideal for slow cooking; tenderizes beautifully with heat. |
| Brisket | Rich flavor; great for longer cooking times, yielding melt-in-your-mouth tenderness. |
| Round Roast | Leaner option; less fat but can still be tender if cooked properly. |
| Short Ribs | Full of flavor; excellent for braising, resulting in a hearty dish. |
Always trim excess fat, as it can lead to greasiness. I prefer to sear the meat before adding it to the pot; this enhances the overall depth of flavor. Choosing the right cut significantly impacts the final taste and texture, making it a crucial step in the cooking process.
Choosing the Best Red Wine for Cooking
Select a full-bodied variety such as Cabernet Sauvignon or Merlot. These types contribute rich flavors that enhance the dish. Avoid sweet options; they can lead to an overly sugary taste in the final product.
Consider the Region
Wines from regions like Bordeaux or Napa Valley are excellent choices due to their robust profiles. Wines from these areas are often crafted with cooking in mind, providing depth and complexity.
Price Range
Avoid extremely cheap bottles, as they may contain undesirable additives. Aim for a price point around $10 to $20. This range typically ensures quality without breaking the bank. Remember, if it’s not good enough to drink, it’s not good enough for cooking.
Always taste the wine before adding it to your dish. This ensures the flavors align with your expectations, allowing for necessary adjustments in seasoning or cooking time.
Preparing Vegetables for the Dish
I recommend choosing a variety of root vegetables for their robust flavors and textures. Carrots, potatoes, and parsnips are excellent options. These ingredients not only enhance the overall taste but also provide a hearty base.
Essential Vegetables
- Carrots: Peel and slice them into thick rounds. This ensures they retain their shape and texture during cooking.
- Potatoes: Use waxy types like Yukon Gold or red potatoes. Cut into chunks for even cooking, and leave the skins on for added flavor.
- Parsnips: Trim and cut into similar-sized pieces as the carrots to maintain uniform cooking times.
- Onions: Chop into large pieces to add sweetness and depth. Yellow onions work well.
- Garlic: Crush and roughly chop; it infuses the dish with its aromatic qualities.
Preparation Tips
- Wash all vegetables thoroughly to remove any dirt.
- Cut vegetables into consistent sizes to ensure even cooking.
- Consider sautéing onions and garlic in a pan before adding them. This step intensifies their flavors.
- Add herbs like thyme or rosemary to the mix for an aromatic boost.
Using this selection and preparation method will elevate the dish, providing a delightful balance of flavors and textures. Enjoy the process of combining these ingredients for a satisfying meal.
Marinating the Meat: Tips and Techniques
For optimal flavor and tenderness, I recommend marinating the meat overnight. A good marinade typically consists of an acidic component, such as vinegar or citrus juice, combined with herbs and spices. For a robust flavor, I like to use garlic, rosemary, and thyme.
Choosing the Right Marinade Ingredients
To create a balanced marinade, use a ratio of 1 part acid to 3 parts oil. This helps to tenderize while infusing flavors. Adding a splash of soy sauce or Worcestershire sauce enhances umami notes, making the dish richer. Don’t forget to include salt, which aids in seasoning the protein effectively.
Marinating Techniques
Use a resealable plastic bag or a glass container for marinating. Ensure that the meat is fully submerged in the marinade for even coverage. If using a bag, press out excess air to allow for better contact with the marinade. Occasionally turning the bag or stirring the contents of the container will ensure even absorption of flavors.
Layering Ingredients for Optimal Flavor
For maximum taste, I prioritize the order of ingredients in the pot. Start with hearty components like root vegetables at the bottom. This creates a sturdy base that absorbs moisture and flavor as the dish simmers. I prefer onions, carrots, and potatoes, which not only withstand long cooking times but also release their natural sweetness, enhancing the overall profile.
Mid-Layers: Building Complexity
Next, I add the marinated chunks of meat. Positioning them above the veggies allows the meat to brown slightly and locks in its juices. I often sprinkle herbs like thyme and rosemary at this stage, allowing their essence to infuse into the meat. This layering technique ensures that each bite is seasoned perfectly.
Top Layer: Finishing Touches
Finally, I pour in the liquid–usually a rich broth and a splash of my chosen fermented grape beverage. I prefer to add garlic and any delicate herbs at the top, ensuring they retain their aromatic qualities. This method guarantees that the ingredients interact harmoniously, resulting in a dish bursting with flavor and depth.
Setting the Slow Cooker: Time and Temperature
For optimal results, I recommend setting the appliance to low for 8 to 10 hours. This slow process allows flavors to meld beautifully and results in tender meat. If you’re short on time, a high setting for 4 to 6 hours can work, but be mindful that the texture may not be as rich.
Temperature Guidelines
Ensure the internal temperature of the dish reaches at least 190°F (88°C) for the best flavor and tenderness. I often use a meat thermometer to check this, especially when experimenting with different cuts.
Timing Tips
I find that adding ingredients in stages can enhance the dish. For instance, tossing in root vegetables halfway through the cooking time prevents them from becoming mushy. Additionally, I suggest checking the progress about an hour before the end to adjust seasoning as needed.
Checking for Doneness: How to Know When It’s Ready
To determine the perfect readiness of your dish, I rely on several key indicators:
- Meat Tenderness: When I poke the meat with a fork, it should pull apart easily. If there’s resistance, it likely needs more time.
- Internal Temperature: Using a meat thermometer, I check for an internal temperature of at least 190°F (88°C). This ensures that collagen has broken down, resulting in a tender texture.
- Vegetable Softness: The vegetables should be fork-tender. I often check a few pieces to ensure they’re cooked through without being mushy.
- Flavor Development: As the dish simmers, I taste for seasoning depth. If flavors seem muted, an extra hour might enhance them further.
I find that letting the dish rest for about 10-15 minutes before serving allows the flavors to settle, enhancing the overall experience. This also gives me time to garnish and prepare accompaniments.
Adapting to the specific slow-cooking model I use can influence cooking times. Regular checks can help me avoid overcooking or undercooking, ensuring a delightful meal every time.
Serving Suggestions and Pairings
For a delightful dining experience, I recommend serving this hearty dish with creamy mashed potatoes or buttery egg noodles to soak up the savory juices. A side of roasted seasonal vegetables adds a colorful and nutritious touch, enhancing the overall presentation.
A fresh green salad tossed with a tangy vinaigrette complements the rich flavors beautifully. Consider using mixed greens, cherry tomatoes, and thinly sliced red onions for a refreshing contrast.
For beverages, a glass of the same varietal used in cooking pairs wonderfully. If you prefer something non-alcoholic, a sparkling grape juice or a rich, herbal tea can provide a satisfying alternative.
To elevate the meal, I often serve crusty bread on the side, perfect for mopping up the delicious sauce. A sprinkle of fresh herbs, such as parsley or thyme, just before serving adds a burst of freshness and a pop of color.
Finally, a well-chosen cheese platter featuring sharp cheddar, aged gouda, or blue cheese can serve as a delightful appetizer, setting the tone for the meal ahead.
Storing Leftovers: Best Practices
Transfer any remaining portions into airtight containers as soon as the meal cools down to prevent bacterial growth. Use shallow containers for quicker cooling. Label each container with the date to track freshness.
Refrigeration Tips
Store in the refrigerator if you plan to consume within three days. Keep the temperature below 40°F (4°C). Avoid placing hot dishes directly in the fridge; let them cool to room temperature first.
Freezing for Later Use
If you need to keep it longer, freezing is a great option. Portion into freezer-safe containers or heavy-duty freezer bags, removing as much air as possible. It can last up to three months in the freezer. Thaw in the refrigerator overnight before reheating.
Always reheat to an internal temperature of 165°F (74°C) before serving leftovers to ensure safety. Enjoy your meal again with the same delightful flavors!