
Act quickly: blot the affected area with a clean cloth to absorb excess liquid. This immediate action minimizes the stain’s spread and prevents deeper penetration into the fibers.
Next, sprinkle table salt over the damp spot. Salt acts as a natural absorbent, drawing out the pigment. Allow it to sit for approximately five minutes before gently brushing it off.
Afterward, prepare a mixture of hydrogen peroxide and dish soap in equal parts. Apply this solution directly to the stain using a soft cloth or sponge. Gently dab the area without rubbing, which could damage the fabric. Rinse thoroughly with cool water.
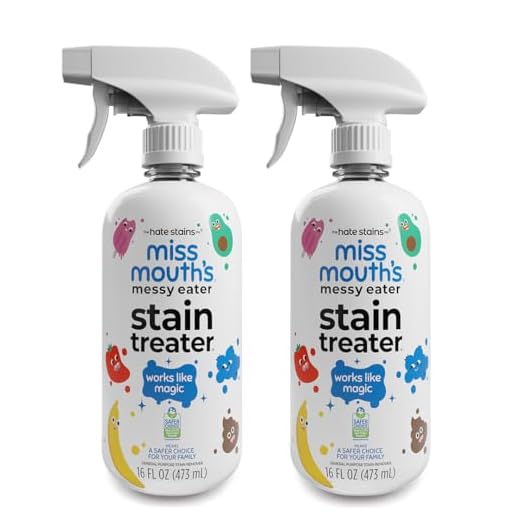
For persistent marks, a commercial stain remover designed for delicate fabrics can be effective. Always perform a patch test on an inconspicuous area first to ensure no damage occurs. Follow the product instructions carefully for optimal results.
Finally, air-dry the garment away from direct sunlight, as heat can set any remaining stain. If necessary, repeat the cleaning process until the stain is completely gone.
Act Quickly: Initial Steps to Take
Immediately blot the stain with a clean cloth or paper towel. Avoid rubbing, as this can spread the liquid further into the fibers. Use a gentle dabbing motion to absorb as much as possible.
Next, sprinkle salt or baking soda directly onto the stained area. These substances can help draw out the liquid from the fabric. Allow it to sit for approximately five minutes before gently brushing it off.
Water Application
After treating with salt or baking soda, rinse the affected area with cold water. Ensure the flow of water is from the back of the fabric to prevent further penetration of the liquid. This method will help to push the stain out rather than deeper into the material.
Prepare for Further Treatment
Once the initial steps are completed, prepare a mixture for deeper cleaning. Combine equal parts of white vinegar and dish soap, then apply it to the stained area. Allow it to rest for about 30 minutes before rinsing again.
| Step | Action |
|---|---|
| 1 | Blot the stain with a clean cloth |
| 2 | Sprinkle salt or baking soda |
| 3 | Rinse with cold water |
| 4 | Apply vinegar and soap mixture |
Choosing the Right Cleaning Solution
Select a solution based on the fabric type and the extent of the stain. For delicate fibers like cashmere or silk, opt for a gentle detergent or a specialized fabric cleaner. In contrast, sturdy materials such as cotton can handle stronger stain removers.
Consider using a solution containing enzymes, which effectively break down organic compounds in stains. Alternatively, a mixture of white vinegar and dish soap can be effective for initial treatment. Combine one part vinegar with two parts water and a few drops of dish liquid for a homemade remedy.
For tougher stains, commercial products designed specifically for tackling beverage marks can be beneficial. Always test any cleaning agent on a hidden area of the fabric to ensure it does not cause discoloration.
Hydrogen peroxide serves as another potent option, especially for light fabrics. Dilute it with water in a 1:1 ratio and apply it directly to the affected area. This method may require careful monitoring to avoid unwanted bleaching.
Finally, always follow the manufacturer’s instructions on any store-bought solutions and stay vigilant about the fabric care label for best results. Choosing the right cleaning solution is key to preserving your garment’s integrity while addressing the stain effectively.
Applying Stain Removal Techniques
Blot the affected area with a clean, dry cloth to absorb excess liquid without rubbing. This prevents the stain from spreading further. Next, sprinkle salt or baking soda directly onto the mark. Both substances act as absorbents, drawing out the pigment from the fabric.
After allowing the absorbent to sit for about 15 minutes, gently brush it off. Rinse the spot with cold water from the back of the fabric to push the stain out rather than deeper into the fibers.
If the stain persists, create a mixture of hydrogen peroxide and dish soap in equal parts. Apply this solution to the stain using a soft cloth, dabbing gently. Allow it to work for approximately 30 minutes before rinsing with cold water.
For stubborn marks, consider using a specialized stain remover designed for delicate fabrics. Always follow the product instructions and test on an inconspicuous area first to ensure no damage occurs.
After treatment, wash the garment as per the care label instructions. Avoid using hot water, as it can set stains. Air dry the item instead of using a dryer, as heat can also cause remaining traces to become permanent.
Rinsing and Checking the Stain
Immediately rinse the affected area with cold water. Hold the fabric under running water from the back to push the liquid out, preventing it from spreading. Aim for a gentle pressure to avoid damaging the fibers.
After rinsing, inspect the fabric closely. Look for any signs of discoloration or residue that may remain. If the stain is still visible, do not dry the garment, as heat can set the mark, making removal more difficult.
Use a clean, white cloth or paper towel to blot the area gently, absorbing any excess moisture. This step helps in evaluating the extent of the stain and determining whether further treatment is necessary.
If the stain persists after rinsing, prepare for the next phase of treatment with your chosen cleaning solution. Having a clear view of the condition of the fabric will aid in applying the most effective techniques moving forward.
Drying the Sweater Properly
After treating the fabric, place the garment flat on a clean, dry towel. Roll the towel gently to absorb excess moisture without wringing or twisting the material, which can cause distortion.
Once most of the water is absorbed, transfer the item to a drying rack or another flat surface. Ensure good air circulation around it, avoiding direct sunlight or heat sources that may warp the fibers.
Maintaining Shape
While the garment is drying, reshape it to its original form. Pay attention to the collar and sleeves, smoothing out any wrinkles. This prevents unnecessary creasing as it dries.
Final Check
Once completely dry, inspect the area for any remnants of the stain. If needed, repeat previous cleaning steps before considering the item fully restored.
When to Seek Professional Help
If initial attempts at stain removal prove ineffective, consider enlisting a professional cleaner. Their expertise can be invaluable, especially for delicate fabrics or persistent discolorations. Here are specific scenarios when professional assistance is warranted:
- Stain Persistence: If the blemish remains after multiple treatments, a professional may have access to specialized products and techniques that outperform household solutions.
- Fabric Sensitivity: For delicate materials like silk or cashmere, risking further damage with DIY methods is unwise. Professionals understand the nuances of various textiles.
- High-Value Garments: If the item is particularly expensive or holds sentimental value, a professional’s skills could save it from irreversible damage.
- Time Constraints: If you’re pressed for time and need quick results, a cleaner can expedite the process with their resources.
In addition, when facing stubborn marks, it’s wise to consult resources or professionals who specialize in garment care. Their insights can provide tailored advice for your specific situation. For those interested in culinary pursuits, exploring cooking techniques such as how to cook lamb chump chops can offer a delightful diversion while waiting for your garment to be restored.


