
For immediate action, grab a clean cloth and blot the affected area gently. Avoid rubbing, as this may spread the substance further.
Next, prepare a mixture of equal parts water and white vinegar or dish soap. Dampen another cloth with this solution and apply it to the stain, continuing to blot. Rinse the area with water afterward to eliminate any residue.
If the mark persists, consider using a paste made of baking soda and water. Apply it directly to the stain, let it sit for a few minutes, then wipe away with a damp cloth.
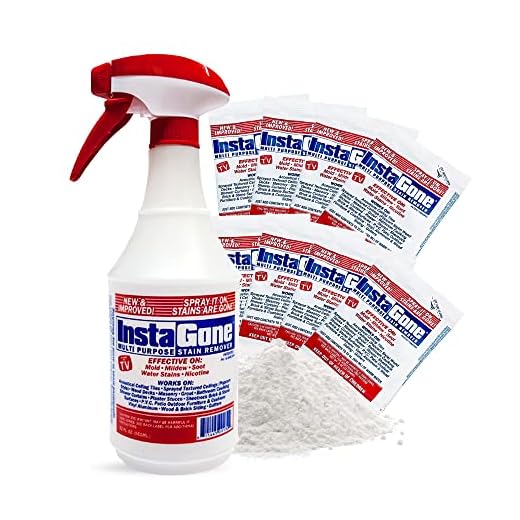
In cases of stubborn discoloration, a commercial stain remover designed for your wall type can be effective. Always test any product on a small, inconspicuous area first to ensure no damage occurs.
Lastly, maintaining the surface with regular cleaning can help prevent future stains from setting in.
Removing Stains from Painted Surfaces
Start by blotting the area with a clean cloth to absorb excess liquid. Avoid rubbing, as this may spread the stain further. Prepare a mixture of warm water and mild soap, then gently dab the stained area with a soft sponge or cloth soaked in the solution. Rinse with a damp cloth to remove soap residue.
Alternative Solutions
If the initial attempt doesn’t work, try a solution of equal parts white vinegar and water. Apply it to the stain using a soft cloth, then wipe gently. For stubborn marks, a baking soda paste (baking soda mixed with water) can be applied directly to the stain. Allow it to sit for a few minutes before rinsing.
| Method | Ingredients | Instructions |
|---|---|---|
| Soap Solution | Warm Water, Mild Soap | Blot, apply with a cloth, rinse |
| Vinegar Solution | White Vinegar, Water | Apply, wipe gently |
| Baking Soda Paste | Baking Soda, Water | Apply, let sit, rinse |
After cleaning, ensure the area dries properly to prevent any further damage to the surface. If the stain persists, consider consulting a professional for specialized cleaning solutions tailored to your wall type.
Assessing the Stain: Immediate Steps to Take
Immediately address the discoloration by following these steps:
- Evaluate the extent of the blemish. Identify if it is fresh or has begun to set in.
- If the mark is recent, act swiftly. Blot the area using a clean, dry cloth or paper towel. Avoid rubbing, as this can spread the liquid further.
- For older stains, gently scrape off any dried residue using a plastic spatula or a similar tool. Be careful not to damage the surface.
- Examine the wall’s material. Different finishes require specific cleaning techniques. For example, flat paint may absorb more, while satin or semi-gloss can be wiped more easily.
After assessing the situation, prepare to treat the stain with appropriate solutions to restore the wall’s appearance.
Choosing the Right Cleaning Solution for Stains
For effective removal of purple liquid marks, a well-chosen cleaning agent is crucial. Begin with white vinegar mixed with water in equal parts. This solution neutralizes acidity and works wonders on porous surfaces.
Another option is a baking soda paste. Combine baking soda with a small amount of water to create a thick paste, then apply it to the affected area. Allow it to sit for about 10-15 minutes before gently scrubbing with a soft cloth.
Commercial Cleaners
If natural remedies fall short, consider specialized cleaning products. Look for those designed for tough stains on walls, particularly those labeled for use on paint or wallpaper. Always perform a patch test in an inconspicuous area to avoid damage.
Hydrogen Peroxide
For stubborn blemishes, a diluted solution of hydrogen peroxide can be effective. Mix one part hydrogen peroxide with two parts water. Apply gently and rinse thoroughly after a short period. This method is particularly useful on lighter-colored surfaces.
Experimentation may be necessary to find the most suitable solution. Always prioritize the integrity of your wall finish while treating the stain.
Applying the Cleaning Solution: Techniques and Tips
Begin with a blotting technique; gently press a clean cloth against the affected area to absorb excess liquid. Avoid rubbing, as this can spread the stain further.
For the cleaning mixture, combine equal parts of white vinegar and water in a spray bottle. Test this solution on a discreet area of the surface to ensure it doesn’t cause discoloration. Once verified, spray it onto the stained zone.
Allow the solution to sit for approximately five minutes, facilitating the breakdown of pigments. Afterward, use a soft sponge or cloth to dab at the stain, working from the outer edges toward the center. This prevents the stain from spreading.
Rinse the area with a damp cloth to remove any residue from the cleaning solution. Follow up by drying the area with a clean towel to prevent moisture accumulation, which could lead to mold.
For stubborn marks, consider using a paste of baking soda and water. Apply this paste directly onto the stain, let it sit for about ten minutes, and then scrub gently with a soft bristle brush. Rinse thoroughly afterward.
Always keep in mind to wear gloves when handling cleaning products, and ensure proper ventilation in the area to avoid inhaling any fumes. If the surface is painted, be cautious with stronger chemicals, as they may damage the finish.
Using Household Items: DIY Solutions for Stain Removal
Baking soda serves as an excellent abrasive that can lift marks. Mix a few tablespoons with water to create a paste. Apply this mixture directly to the affected area and let it sit for approximately 10-15 minutes before scrubbing gently with a soft cloth.
White vinegar effectively neutralizes pigments. Combine equal parts of vinegar and water in a spray bottle. Spray the solution on the stain and blot with a clean cloth until the area appears clearer. This method is particularly useful for fresh blemishes.
Dish soap can aid in breaking down the stain. Mix a couple of drops with water, apply to the spot, and wipe with a soft cloth. Rinse the area afterward to remove any soap residue.
Hydrogen peroxide acts as a mild bleach. Use a solution with a concentration of 3%. Apply it directly to the mark, allowing it to sit for a few minutes, then blot with a cloth. Test in an inconspicuous area before full application to ensure no discoloration occurs.
For persistent marks, consider using a paste made from cream of tartar and water. Apply this paste, let it dry, and then gently scrub it off. This method is particularly effective on porous surfaces.
- Baking Soda: Mix with water for a paste.
- White Vinegar: Combine with water in a spray bottle.
- Dish Soap: A few drops mixed with water.
- Hydrogen Peroxide: Use a 3% solution directly.
- Cream of Tartar: Make a paste and apply.
For all methods, ensure to test any solution on a discreet area first to prevent damage.
Dealing with Different Wall Materials: Paint, Wallpaper, and More
For painted surfaces, act quickly. Blot the spill gently using a soft cloth, then apply a mixture of dish soap and water. Use a clean sponge to dab the area until the stain fades. Rinse with water and dry thoroughly.
When faced with wallpaper, assess the material. If it’s vinyl, the cleaning method above works well. For non-vinyl options, use a damp cloth with a mild cleaner. Avoid aggressive scrubbing, which can damage the surface. Test any solution on a hidden area first.
Textured walls require a different approach. Use a soft-bristled brush to reach into crevices. A mixture of baking soda and water can help lift stubborn marks. Apply gently and rinse carefully to avoid residue.
For plaster or drywall, be cautious. Dampen a cloth with water and gently blot the area. If the stain persists, consider a diluted vinegar solution. Always follow up with a clean damp cloth to remove any cleaning solution.
For those interested in culinary pursuits, check out this guide on how to cook flap meat in cast iron skillet for a delightful pairing with your favorite beverage.
Preventing Future Stains: Tips for Wine Lovers
Always place coasters or absorbent materials under glasses to catch any drips or spills. Invest in high-quality, spill-resistant glassware that minimizes risk during gatherings.
Consider using tablecloths or placemats made from darker fabrics, which can hide potential blemishes. For walls, applying protective finishes or washable paints can make cleanup easier if an incident occurs.
Designated Areas
Establish specific zones for enjoying beverages, away from walls and delicate furnishings. This reduces the likelihood of accidents in areas that are harder to clean.
Educating Guests
Communicate with friends and family about being cautious while enjoying their drinks. Encourage them to handle glasses carefully, especially during lively conversations or celebrations.
When to Call a Professional: Signs You Need Help
If persistent discoloration remains after your attempts at cleaning, it’s advisable to enlist expert assistance. Stains that set into the surface, particularly on porous materials, often require specialized techniques and products to restore the original appearance.
Indicators of Damage
Noticeable alterations in texture or color around the affected area may signal deeper issues. If the wall has begun to peel or bubble, the integrity of the surface could be compromised, necessitating a professional’s evaluation to prevent further deterioration.
Complex Textures and Finishes
For intricate designs, such as embossed wallpaper or specialty paints, attempting DIY remedies may worsen the situation. Professionals possess the experience and tools to handle these delicate surfaces without causing additional harm.