
If you have a bottle of leftover burgundy, consider converting it into a delightful acidic addition for your culinary adventures. The process is straightforward and requires minimal ingredients: just your choice of the fermented beverage and a source of bacteria. The key is to allow that liquid to breathe, encouraging the right microorganisms to flourish and create the desired flavor profile.
First, select a container that is non-reactive, such as glass or ceramic, to avoid any interference with the fermentation process. Pour the chosen liquid into the vessel, leaving some space at the top to allow for airflow. Introducing a mother culture–either a store-bought version or a portion from a previous batch–will kickstart the transformation. If you don’t have one, simply letting the mixture sit exposed to air can also yield results, though it may take longer.
Store the container in a warm, dark place, checking periodically for progress. You’ll notice a layer forming on the surface, which indicates that the fermentation is underway. After a few weeks, taste the concoction to assess its tanginess. If it has reached your preferred acidity, strain out any solids, bottle it, and store it in the refrigerator. Enjoy this homemade addition in dressings, marinades, or even as a finishing touch for various dishes.
Choosing the Right Red Wine for Vinegar
Select a bottle with a high acidity level, ideally around 6-7%. This acidity is crucial for the fermentation process and will enhance the final product’s tanginess.
Avoid overly complex or expensive selections. Instead, focus on affordable options that offer rich flavors, such as a fruity Merlot or a bold Zinfandel. These varieties can provide depth without breaking the bank.
Consider the Flavor Profile
Opt for wines that have a balanced taste, avoiding those that are overly tannic or oaky. A smooth Cabernet Sauvignon or a lively Grenache can offer pleasant aromatic notes, contributing to the character of your homemade product.
Be mindful of the sweetness level. A dry wine will yield a more desirable outcome than a sweet counterpart. Look for labels that indicate “dry” to ensure the right fermentation process.
Storage and Quality
Choose a bottle that has been stored properly, as quality is paramount. Look for wines that are free from faults or off-flavors, as these can negatively impact the final taste.
Lastly, trust your palate. If you enjoy the flavor of the wine, it will likely translate well into your homemade creation, leading to a more satisfying result.
Necessary Equipment for Homemade Vinegar Production
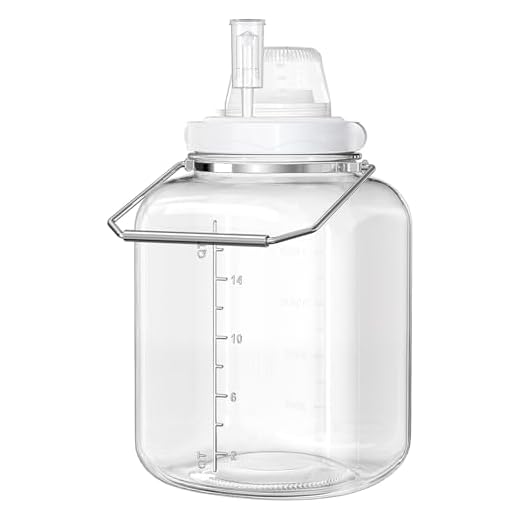
For transforming fermented grape juice into tangy liquid, a few specific tools are indispensable. First, a clean glass jar or a ceramic crock with a wide mouth is essential. This allows for proper airflow while keeping contaminants at bay. A container with a capacity of at least one liter is ideal.
A breathable cover, such as a cheesecloth or a paper towel secured with a rubber band, serves as a protective barrier against dust and insects while enabling oxygen to promote fermentation. Avoid using metal lids, which can corrode and affect flavor.
A stirring utensil is necessary for mixing. A wooden spoon or a silicone spatula works well, as they won’t react with the acidic environment. It’s also wise to have a funnel handy for transferring liquids without spillage.
Monitoring temperature and humidity is crucial. A kitchen thermometer ensures the environment remains stable, ideally between 60°F to 80°F (15°C to 27°C). Humidity can be gauged with a hygrometer to maintain the optimum conditions for fermentation.
Lastly, a clean glass bottle for storage is needed once the process is complete. Dark glass is preferable to protect the final product from light, which can degrade its quality. Make sure it has a cork or a tight-sealing cap to keep air exposure minimal.
Step-by-Step Process of Fermentation
Begin with a clean glass container, preferably a wide-mouthed jar or a fermentation crock. This ensures proper airflow and easier access for stirring.
1. Combine Ingredients
Pour your chosen liquid into the container, filling it about halfway. If you’re using a starter culture, add it at this stage. This can be unpasteurized vinegar or a vinegar mother, which contains beneficial bacteria.
2. Cover and Secure
Cover the top with a piece of cheesecloth or a breathable fabric. This allows air to circulate while preventing dust and insects from contaminating your brew. Secure it with a rubber band or string.
3. Monitor Temperature and Location
Place the container in a warm, dark area, ideally between 60-80°F (15-27°C). Avoid direct sunlight, which can alter the flavor. Check it periodically for any signs of unwanted mold.
4. Stir Regularly
Every few days, gently stir the mixture. This helps incorporate oxygen, an essential element for the bacteria to thrive. Continue this process for 2-3 weeks, depending on your desired acidity level.
5. Taste Test
After a few weeks, begin tasting. The flavor should evolve from fruity to tangy. Once it reaches your preferred acidity, it’s time to strain and bottle your creation.
6. Strain and Store
Use a fine mesh strainer or cheesecloth to separate the liquid from any solids. Transfer the liquid to clean bottles, leaving some space at the top. Seal and store in a cool, dark place.
7. Aging
Allow the bottled product to age for a few months. This enhances the flavors and mellows the acidity, resulting in a more complex profile.
| Step | Action |
|---|---|
| 1 | Combine ingredients in a clean container. |
| 2 | Cover with breathable fabric. |
| 3 | Place in a warm, dark location. |
| 4 | Stir every few days. |
| 5 | Taste until desired acidity is reached. |
| 6 | Strain and transfer to bottles. |
| 7 | Age for a few months. |
Monitoring and Maintaining Ideal Conditions
Temperature stability is fundamental during fermentation. Aim to keep the environment between 60°F and 80°F (15°C to 27°C). Use a thermometer to check the temperature regularly, adjusting your space with blankets or heaters as needed. A consistent temperature promotes healthy bacterial activity.
Oxygen exposure must be managed carefully. Use a breathable cover, like cheesecloth, to allow airflow while preventing contaminants. Regularly check for any signs of mold or unwanted growth. If detected, remove the cover immediately and inspect the liquid for spoilage.
Humidity Levels
Maintain a relative humidity of around 60% to 70%. Excessive dryness can cause evaporation, while too much moisture can promote mold. A hygrometer can be helpful in monitoring these levels. If necessary, utilize a humidifier or dehumidifier to achieve balance.
Tasting for Progress
Regular tasting is essential. Sample the liquid every few weeks to track flavor development. This will help you determine when the acidity has reached your desired level. Keep notes on each tasting to guide future batches and refine your process.
Storing and Using Your Homemade Fermented Liquid
For optimal preservation, store your crafted liquid in a cool, dark place, like a pantry or cellar. Avoid direct sunlight and heat sources to maintain quality. Use glass containers with airtight lids or corks to prevent oxidation.
Best Practices for Storage
- Choose dark glass bottles to shield contents from light.
- Keep your bottles upright to minimize contact with the air.
- Label each bottle with the date of production for tracking freshness.
Check on your jars periodically for signs of spoilage or off smells. If any sediment forms, it’s normal; simply filter before use if desired.
Using Your Fermented Liquid
- In cooking, it enhances dressings, marinades, and sauces.
- Consider using it as a finishing touch on roasted vegetables or meats.
- Add a splash to soups and stews for added depth of flavor.
For those interested in sustainable energy, consider pairing your culinary adventures with a best solar panel generator for home to power your kitchen appliances.
Experiment with different dishes to find unique pairings that highlight its tangy notes. Remember to start with small amounts, adjusting to taste as you refine your recipes.
FAQ:
What ingredients are needed to make red wine vinegar from red wine?
To make red wine vinegar, you primarily need red wine and a vinegar mother, which is a culture of acetic acid bacteria. The red wine provides the base flavor, while the vinegar mother is responsible for the fermentation process. You can also use a clean glass jar or a fermentation vessel and a breathable cover like cheesecloth to allow air circulation while keeping out contaminants.
How long does it take to make red wine vinegar?
The process of making red wine vinegar typically takes about 3 to 6 weeks. This duration can vary depending on factors such as temperature, the strength of the vinegar mother, and the type of wine used. During this time, the acetic acid bacteria convert the alcohol in the wine into acetic acid, which gives vinegar its characteristic tangy flavor.
Can I use any type of red wine to make vinegar?
Yes, you can use various types of red wine to make vinegar, but the flavor of the resulting vinegar will reflect the wine you choose. It’s best to use a wine that you enjoy drinking, as the vinegar will carry those flavors. However, avoid using wines that are overly sweet or have artificial additives, as these can affect the fermentation process.
What is a vinegar mother, and how do I get one?
A vinegar mother is a gelatinous mass of acetic acid bacteria that forms during the fermentation of vinegar. You can obtain a vinegar mother from unpasteurized vinegar (like raw apple cider vinegar) or from someone who has previously made vinegar. Alternatively, you can also make your own vinegar mother by allowing a mixture of wine and water to ferment with exposure to air for a few weeks until a mother forms.
What should I do if my red wine vinegar doesn’t taste right?
If your red wine vinegar does not taste as expected, there are a few things you can check. First, ensure that the fermentation process is progressing; it should have a tangy aroma. If it tastes too harsh, it may need more time to mature. If it tastes flat or lacks acidity, it might not have enough vinegar mother or the conditions for fermentation may not have been optimal. You can also try adding a bit more red wine to enhance the flavor and acidity.


